ADA

The ADA at 29 – Safe Harbors

Tuesday, July 2nd, 2019


Thanks to my friend Mike Griffin from Dallas Texas who suggested this great topic.  Hope you enjoy
July 26, 2019 will be 29 years since the ADA was passed into law.  Since its first publishing there was one revision that happened in 2010.  When it was revised there were certain changes from the original.  But they added a provision that stated that when doing a renovation, the original requirements are still valid for existing conditions.  In other words if the elements are existing and compliant with the previous version of the ADA Standards, they may remain as they are and they will be considered compliant.  This is called a “Safe Harbor”.  This newsletter will explain the concept of a safe harbor and when you can apply it.
Examples of a Safe Harbor
The ADA defines a safe harbor as:
(d) Relationship to Alterations Requirements of Subpart D 
 
(2) (i) Safe harbor. Elements that have not been altered in existing facilities on or after March 15, 2012, and that comply with the corresponding technical and scoping specifications for those elements in the 1991 Standards are not required to be modified in order to comply with the requirements set forth in the 2010 Standards…
Some examples of the things that changed that if left the way during a renovation will be considered compliant are:
Side approach reach
 
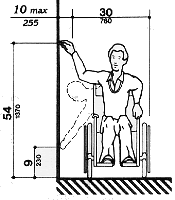
In the 1991 ADAAG, the unobstructed reach range to an operable part that is approached on the side was between 9″ to the lowest operable part to 54″ to the tallest operable part
old side

The 2010 ADA Standards raised the bottom reach to 15″ and lowered the top reach to 48″ a.f.f.

So in an existing restroom, for example, if the paper towel dispenser operable part (the part you operate to dispense the paper towels) was mounted at 54″ a.f.f. , it would still be counted as compliant today.  It would even be counted as compliant when you remodel said restroom but do not touch the paper towel dispenser.

Water Closet Clearance
 
In the 1991 ADAAG, there were several ways that you could approach and transfer onto the water closet.  The figure below showed you the choices you had:
As shown above, the lavatory was allowed to be inside the floor clearance of the water closet as long as it was 36″ from the side wall and it had a knee space at the sink.
The new standard you are required a 60″ clear at the water closet floor space.  A lavatory or any other fixture is not allowed to overlap.
So if an existing toilet room has the 1991 layout it will be acceptable and will be considered a safe harbor.  If the restroom is remodeled, then part of the new standards takes each element into consideration for requirements, and a change in one element will not trigger that the entire restroom be upgraded.  If all the fixtures are removed, then you would have to make it comply with the 2010 Standards, or file a variance if it is not technically feasible.
This toilet room was built prior to 2012 and it has a 46″ clear floor space at the water closet.  This is an example of a safe harbor.

Drinking Fountains

In the 2010 Standards it is required to have a forward approach knee clearance for drinking fountains designed for people who use wheelchairs.  In the 1991 ADAAG it was allowed to have a parallel approach for the drinking fountains.
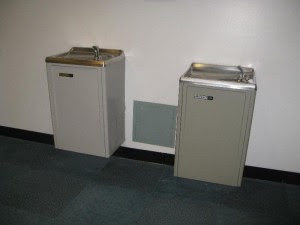
So if there are any drinking fountains without a knee space, but the spout is no higher than 36″ a.f.f. then it is a “safe harbor” and compliant with the 2010 ADA Standards
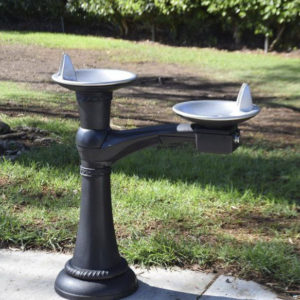
These drinking fountains don’t meet the requirements for the 2010 ADA Standards, but because they meet the 1991 ADAAG they are a safe harbor and are deemed compliant.
 
What is NOT a Safe Harbor
When the ADA Standards were revised, they included requirements that were not covered in the original document.  Those new requirements will not be part of the Safe Harbor provision.  In other words, if you have an existing element that was not covered in the original standard it is not “grandfathered” and it must be brought up to the new standards.
Some of the examples are listed below:
Playground equipment
 
Existing playground equipment at parks or schools were never covered in the 1991 ADAAG.  Therefore existing playground equipment must be brought up to compliance “as it is readily achievable” according the the DOJ.

Swimming Pools

Another new element that was added in 2010 was swimming pools.  Again, existing pools are not “grandfathered” and will be required to be brought up to compliance.

Accessible Hotel Rooms

Wednesday, April 10th, 2019

Transient Lodging

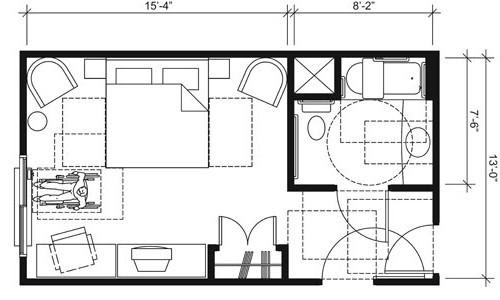
The minimum number of guest rooms required to be accessible in transient lodging facilities is covered by section 224 of the 2010 ADA Standards. Scoping requirements for guest rooms with mobility features and guest rooms with communication features are addressed at section 224.2 and section 224.4, respectively.

Accessible guest rooms are used not only by individuals using mobility devices such as wheelchairs and scooters, but also by individuals with other mobility disabilities including persons who use walkers, crutches, or canes.

Guest rooms with communication features are used by persons that are visually and hearing impaired.
Even knowing where to look does not always make it simple to understand the requirements.  This newsletter will give you some examples of the not so well known rules about Transient lodging.

Roll in Showers

#ADAFact: If there are less than 51 guest rooms in a hotel or dorm, you are required to have mobility rooms without roll in showers.
This rule is very easy to miss because most of hotels have more than 50 guest rooms.  If you have less than 50, there are zero roll-in showers required.  But there are still required accessible bathing fixtures.  In a recent hotel review, I performed there were exactly fifty guest rooms.  I looked at the chart to see how many rooms with mobility features were required and saw that it was two.  But what I also noticed was that both of them could not have a roll in shower.  As a matter of fact, there is always a minimum number that is required without roll in showers.  So they could provide tubs or transfer showers instead.  See the chart below.

If they are interested in providing a roll in shower as an option, they would have to add a third guest room with mobility features.

Shower seats

#ADAFact:  All showers in a “transient lodging” facility are required to have a wall or floor mounted folding seat.
Generally, in the ADA Standards, the only showers that are required to have a seat are transfer showers.  There is one exception: “Transient lodging”
608.4 Seats. A folding or non-folding seat shall be provided in transfer type shower compartments. A folding seat shall be provided in roll-in type showers required in transient lodging guest rooms with mobility features complying with 806.2. Seats shall comply with 610.

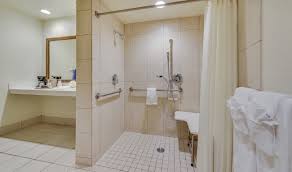
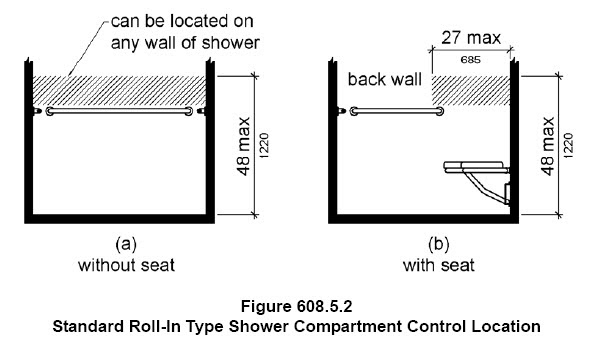
When a roll-in shower has a seat , the controls will have to be located no more than 27″ from the seat wall

controls in the roll in shower were located no farther than 27″ from the seat wall

Dispersion

#ADAFact:  At least one guest room (but no more than 10%) required to provide mobility features as described in the 2010 ADA shall also provide communication features.
That means that you can’t have all your guest rooms with communication features in the mobility rooms.  But you are required to provide at least one of the rooms with both communication and mobility features.
In addition, they have to be dispersed as described below:
224.5 Dispersion. Guest rooms required to provide mobility features complying with 806.2 and guest rooms required to provide communication features complying with 806.3 shall be dispersed among the various classes of guest rooms, and shall provide choices of types of guest rooms, number of beds, and other amenities comparable to the choices provided to other guests. 
 
Where the minimum number of guest rooms required to comply with 806 is not sufficient to allow for complete dispersion, guest rooms shall be dispersed in the following priority: guest room type, number of beds, and amenities. 
 
At least one guest room required to provide mobility features complying with 806.2 shall also provide communication features complying with 806.3. 
 
Not more than 10 percent of guest rooms required to provide mobility features complying with 806.2 shall be used to satisfy the minimum number of guest rooms required to provide communication features complying with 806.3.
In the 1991 ADAAG this was not the case and some establishments made all the rooms with communication features the same as the rooms with mobility features.  Communication features must be available as soon as the guest arrives.  It is no longer allowed to have a device at the front desk for the guest’s to request.

Here are some examples of communication features
this is a hard-wired notification device for the hearing impaired.
There typically is more communication rooms required than mobility rooms, and therefore some would be exclusively rooms with communication features.  Designers must be careful to make sure that they are providing 90% of the rooms with communication features without mobility features.

Location of Diaper Changing Stations

Friday, March 1st, 2019

Diaper Changing Stations

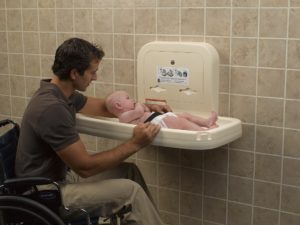
#ADAFact: Diaper changing stations must be compliant with the 2010 ADA section 902, and be able to be used by persons with disabilities.
 In this blog, we will explore the proper locations of a diaper changing station within the restroom, which will allow the technical requirements to be met without creating any other accessibility issues.

The Location could affect Clear Floor Space

One of the requirements is for the diaper changing station to have a forward approach knee space. The location of the table or counter must not have anything in front of it which will impede the forward approach
This baby changing station does not have a clear forward approach because the toilet is in the way
Can the diaper changing station be inside a toilet compartment?  Yes, as long as there is enough room for a forward approach. Even though it is not a violation to have the only diaper changing station in the accessible stall, it would be recommended that it be located so that most of the public can use it without having to wait for the stall to be freed up.
 
The diaper changing station in the photo above is located in the toilet compartment_ but it has plenty of room after entering to have a forward approach

The Location could affect Door Clearance

When locating the diaper changing station on a wall within a single user restroom, it is important to locate it so that it is not in the way of the door maneuvering clearance.  The door should be able to swing clear of the diaper changing station like it is shown on the drawing below 
Not only do we have to be concerned about the diaper changing station when it is closed, but also when it is open.  If the diaper changing station is left open and a person in a wheelchair wants to come into the restroom, they would have a hard time maneuvering through the door since there is not a clear 60 of floor space.

the open diaper changing station is in the way of the
60 inches of required clearance to enter the restroom
this diaper changing counter is in the way of the 18 inches minimum required at the pull side of the door


Possible Protruding Objects

Depending on where the diaper changing counter is located it might be considered a protruding object when open (or closed).  If the person who might have been using it forgets to close it and a person who is visually impaired enters the restroom, if the counter is mounted so that the bottom edge is higher than 27″ a.f.f. then the counter will be an undetectable hazard and a protruding object. This was explained by TDLR in a  Technical MemoTM 2013-15 published in June 2013.
This open counter is higher than 27″ a.f.f. and is located in the way to the toilet. Therefore, it is considered a protruding object


The solution would be to either mount the counter so that the bottom edge is EXACTLY 27″ a.f.f. which provides the required knee clearance, but also allows it to be cane-detectable.  Or it can be relocated away from the circulation path.

What are Detectable Warnings?

Monday, February 4th, 2019
#ADAFact
Detectable warnings are only required at curb ramps located in the public right of way and platform boarding edges.
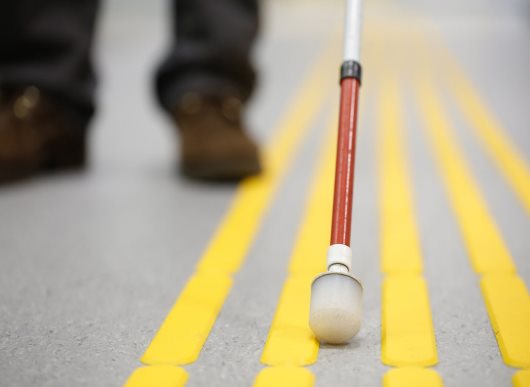
Detectable warnings are used to assist persons that are visually impaired in detecting hazards along their wayfinding.  A person who is visually impaired uses a sense of touch to find their way.  Detectable warnings is one of those methods.  In the 1991 ADAAG, detectable warnings were described as having contrasting color and texture.  Contrasting color meant that it should have a different color than its surroundings (either light to dark or dark to light) and texture was achieved by using truncated domes. They were required at curb ramps and the edges between pedestrian and vehicular ways.
  But in the 2010 ADA Standards they were limited to only platform boarding edges.  The Public Right of Way Accessible Guidelines (PROWAG) and the 2012 Texas Accessibility Standards (TAS) also requires detectable warnings at curb ramps located within the public right of way.
detectable warnings at the platform edge of a train stop
This blog will give you the required regulations governing detectable warnings

Platform Boarding Edges

The ADA standards requires that detectable warnings be located along the boarding edges of trains or bus platforms.
 
ADA 705.2 (train) Platform Edges. Detectable warning surfaces at platform boarding edges shall be 24 inches (610 mm) wide and shall extend the full length of the public use areas of the platform. 
 
ADA 810.5.2 (Bus) Detectable Warnings. Platform boarding edges not protected by platform screens or guards shall have detectable warnings complying with 705 along the full length of the public use area of the platform.
 
light rail boarding platform edge has a lightly colored detectable warning

Public Rights of Way

There are also requirements for public rights of way (located outside the property line). The federal standards are called the “Public Right of Way Accessibility Guidelines” (PROWAG).  These are still a draft and have not been adopted, although they are recommended.  In Texas, TDLR wrote in their administrative rules a set of guidelines for public rights of way.  Below is a brief summary of each.

PROWAG state:

R208 Detectable Warning Surfaces
R208.1 Where Required. Detectable warning surfaces complying with R305 shall be provided at the
following locations on pedestrian access routes and at transit stops:
1. Curb ramps and blended transitions at pedestrian street crossings;
2. Pedestrian refuge islands;
3. Pedestrian at-grade rail crossings not located within a street or highway;
4. Boarding platforms at transit stops for buses and rail vehicles where the edges of the boarding platform are not protected by screens or guards; and
5. Boarding and alighting areas at sidewalk or street level transit stops for rail vehicles where the side of the boarding and alighting areas facing the rail vehicles is not protected by screens or guards.
R305.1.4 Size. 
 
– Detectable warning surfaces shall extend 610 mm (2.0 ft) minimum in the direction of
pedestrian travel. 
 
– At curb ramps and blended transitions, detectable warning surfaces shall extend
the full width of the ramp run (excluding any flared sides), blended transition or turning space.
 
– At pedestrian at-grade rail crossings not located within a street or highway, detectable warnings shall extend the full width of the crossing. 
 
– At boarding platforms for buses and rail vehicles, detectable warning surfaces shall extend the full length of the public use areas of the platform.
 
–  At boarding and alighting areas at sidewalk or street level transit stops for rail vehicles, detectable warning surfaces shall extend the full length of the transit stop.
 
R305.2 Placement. The placement of detectable warning surfaces shall comply with R305.2.


R305.2.3 Blended Transitions. On blended transitions, detectable warning surfaces shall be
placed at the back of curb. Where raised pedestrian street crossings, depressed corners, or other
level pedestrian street crossings are provided, detectable warning surfaces shall be placed at the
flush transition between the street and the sidewalk.


R305.2.4 Pedestrian Refuge Islands. At cut-through pedestrian refuge islands, detectable warning
surfaces shall be placed at the edges of the pedestrian island and shall be separated by a 610 mm
(2.0 ft) minimum length of the surface without detectable warnings


TDLR AB Rules requires:

These requirements are not located in the Texas Accessibility Standards, but rather in the TDLR Administrative Rules Chapter 68
68.102. Public Right-of-Ways Projects
(2) Curb Ramps-
(A) At perpendicular curb ramps constructed within the public right of way, detectable warnings complying with TAS 705 at a minimum of 24″ in depth (in the direction of pedestrian travel) and extending the full width of the curb ramp shall be provided where the pedestrian access route enters a crosswalk or other hazardous vehicular area.


(B) At parallel curb ramps constructed within the public right-of-way, detectable warnings complying with TAS 705 at a minimum of 24″ in depth (in the direction of pedestrian travel) and extending the full width of the landing shall be provided where the pedestrian access route enters a crosswalk or other hazardous vehicular area.


(C) At diagonal curb ramps constructed within the public right-of-way, detectable warnings complying with TAS 705 at a minimum of 24″ in depth (in the direction of pedestrian travel) and extending the full width of the curb ramp or landing, shall be provided where the pedestrian access route enters a crosswalk or other hazardous vehicular area. Additionally, the department will allow the detectable warning to be curved with the radius of the corner.

The detectable warning shall be located so that the edge nearest the curb line is 6″ minimum and 10″ maximum from the curb line.

For more information about PROWAG and its requirements click on this link

TABS (Texas Architectural Barriers online System)

If you do work in Texas you should be aware that there is a new system for online registration and keeping track of the projects.  The  Texas Department of Licensing and Regulation has now created a system that eliminates most paper forms and makes many things cloud-based.
The main differences are as follows:
1) In order to register a project, you will have to create an account with TDLR here
2) The TDLR registration occurs in the pull-down menu shown below.  You can also fill out the registration form and send it to your RAS for her to do it for you.

3) If you register the project yourself, you must also upload the Proof of Submission FormOwner agent form (if there is an owner agent) and a digital copy of the drawings

4) when you register the project (or fill out the registration form), you will also be required to submit the square footage of the building.  If it is not a building, make your best faith effort to estimate it.
5) Once you register the project you will be able to view results and other saved items in the online “file cabinet”
In this new system you will be able to update information to the project, upload revised drawings, and check the status of the project.
If you have any questions about this new system you can reach our office or TDLR directly.

Accessible routes in a multi-story tenant space

Friday, January 4th, 2019

Accessible routes

#ADAFact
The accessible route for people with disabilities must be located so it coincides with the route that everyone else will be taking.
This is the basic tenet of the ADA is for equal access.  The scoping lets us know:
 
206.3 Location. Accessible routes shall coincide with or be located in the same area as general circulation paths. Where circulation paths are interior, required accessible routes shall also be interior
 
In other words, if a route is through the front door, and the front door is not accessible, we are not allowed to make someone in a wheelchair go to the back door to enter the building.
 
This photo shows two entrances: one up some stair (not accessible) and one on the ground (accessible) and both are located in the same location.  This is a good solution to the location of the accessible route coinciding with the general route.


Accessible route in a multi-tenant space

The second part of the statement tells us that if the general route is on the interior, the accessible route must also be on the interior.  This means that if we have a two-story space with an interior stair, the accessible route should also be on the interior of the space.    The ADA has a requirement when providing a new stair in a space:
206.2.3.1 Stairs and Escalators in Existing Buildings. In alterations and additions, where an escalator or stair is provided where none existed previously and major structural modifications are necessary for the installation, an accessible route shall be provided between the levels served by the escalator or stair unless exempted by 206.2.3 Exceptions 1 through 7.
 
This means that if you have two levels that were not connected together at the time of new construction, but they will be connecting by adding a stair as part of an alteration, then an accessible route connecting the two floors (and located in the same area) will have to be provided.

this is a two-story store with an interior stair. An elevator would be required inside the store as well
So If there is an office building with a tenant that would like to lease two floors and connect them with an internal stair, they would be required to also provide an elevator or a ramp connecting the stories.  If the building already had an elevator in the core, this would not be able to be used since the elevator is outside the tenant space.  The new elevator would have to be located within the tenant space.

this office building has an internal ramp that connects two stories
The exception mentioned in the last sentence of the standard describes some buildings that are not required to connect the floors together even if there is a new stair provided.  Read my past newsletter about the elevator exception here

TDLR Technical Memo

The Texas Department of Licensing and regulation issued a technical memo that explains their position on this issue.

What if we can’t make a building comply?

#ADAfact
If it is technically infeasible or not readily achievable to provide access to persons who use wheelchairs, we are still required to provide accessible elements to people with other disabilities such as persons who are visually impaired, or hearing impaired or other mobility challenged who use a walker, crutches and other devices

December 2018: Drinking Fountains for children with disabilities

Tuesday, December 4th, 2018

Drinking Fountains-overview

 Most of the dimensions found in the ADA are for adults.  There are a few technical requirements that are for children.  One of them is for drinking fountains.  What gets confusing is that the requirements listed are for adults.  So how do we incorporate the children’s drinking fountains in our design?

Scoping:

The requirement for drinking fountains are found in the ADA section 211.  They pertain to drinking fountains located on the exterior as well as the interior of the facilities

The minimum number of drinking fountains that must be provided are two.  One of them must be for a person in a wheelchair and one must be for a standing person, or a person that cannot bend down.

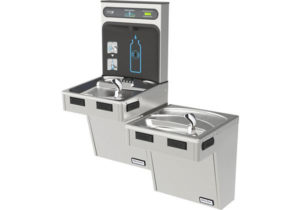
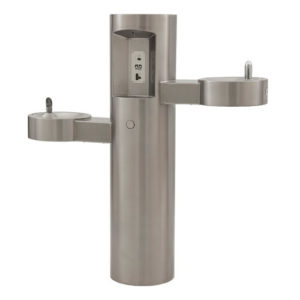
these two drinking fountains are located so that the spout of one is at the height for wheelchairs and the spout of the other is for standing persons

There is an exception that allows us to use a single drinking fountain that has a low spout and a high spout can be used instead of two separate ones.

This clarification tells us that the two drinking fountains required to be provided do not have to be in the same location.  So as long as you have the proper number in the facility, you are compliant.

Approach

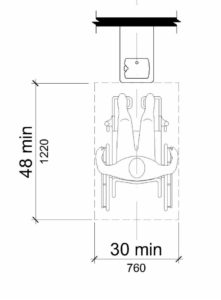
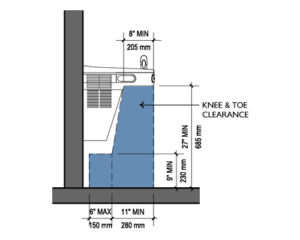
Drinking fountains are required to have a  30″x48″ clear floor space with a forward approach knee space and centered on the unit.


The 30″ width must be centered on the drinking fountain

the clear floor space must be provided as a forward approach and the drinking fountain should have a knee and toe clearance so that the clear floor space can be located under the unit

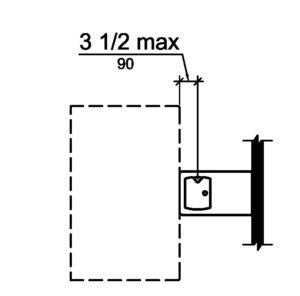
There is one exception for children.   A parallel approach is permitted at units for children’s use where the spout is 30 inches  maximum above the finish floor or ground and is 3½ inches  maximum from the front edge of the unit, including bumpers.

a 30 inch x 48 inch clear floor space positioned for a parallel approach as long as the spout is no farther than 3 1/2 inches from the front of the unit and the spout is no higher than 30 inches a.f.f.

This exception gives us guidance that it is allowed to use a children’s height drinking fountain instead of an adult height wheelchair drinking fountain.  So if you are providing the two minimum number of wheelchairs required in the scoping, one must be for an adult standing and one can be for a child.  You are not required to provide a third drinking fountain for an adult in a wheelchair.

These drinking fountains would be acceptable for both children and for standing people. The spouts would have to be at the proper heights, but no additional adult wheelchair accessible drinking fountain would be required

It is recommended that you do provide an adult wheelchair drinking fountain if your facility will have both adults and children as the primary users.  But if you have a pre-school with drinking fountains for children in the classrooms, these can be counted as your 50% of the required drinking fountains.


Polling and Voting Places

Thursday, November 1st, 2018

Polling and Voting Places

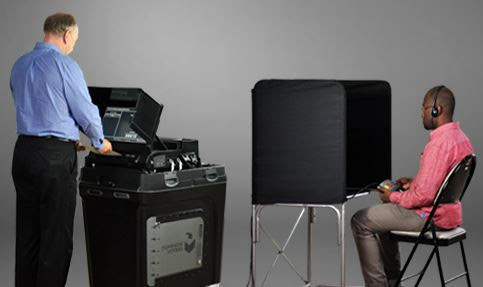
The mid-term elections are being held this month. Because voting happens every few years, the places where people vote are only temporary. Even though the polling centers are only temporary, they are providing a “government program” which has to be made accessible under Title II of the ADA. When someone votes, the service that the government is providing must be equal and available to everyone, including persons with disabilities. The voter who is disabled must be able to have the same privacy as everyone else. The voter who is disabled must have access to the same ballot and the same method of voting as everyone else. So how does a polling place provide this access?

The ADA website has a pamphlet that they put out in 2004 that explains how to provide access even when the polling place is only temporary. The Election Assistance Commission has a video that is also helpful for polling places to provide access.

In a nutshell, the following items need to be provided to the best of their ability, unless it is not feasible and then other accommodations should be provided to ensure that all voters, disabled or not, can cast their ballot:

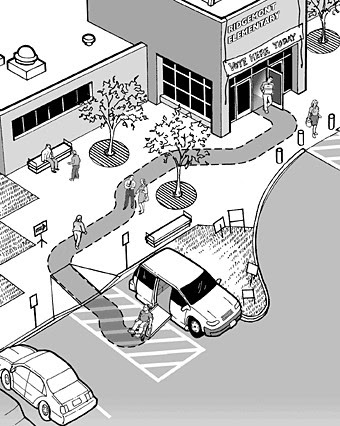
1. Accessible parking or passenger drop off should be available

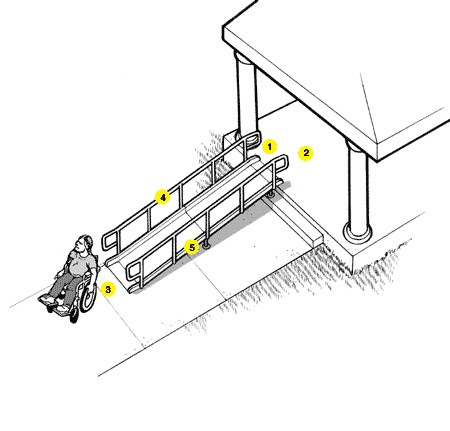
2. An Accessible route to the entrance


3. An accessible entrance to the voting site


4. A route free from hazards

5. Counter or table where the voting is taking place should be between  in height and a forward approach knee space should be provided


Everyone should go to their polling places and make sure there are facilities that are accessible for voters in wheelchairs, voters who are visually impaired as well as hearing impaired. Let’s try and make this election an accessible one.

Door Maneuvering Clearances

Wednesday, August 1st, 2018


In order for a person with disabilities to enter a building on their own, there needs to be enough room for them to get through the door and into the spaces.  This newsletter will explain what the requirements are for doors so that a person can easily open the door and go through it.
What types of doors need to comply?
In the 2010 ADA standards for accessible design the only doors that require compliance with doors that people will pass through:
ADA Section 404.2 Manual Doors, Doorways, and Manual Gates. Manual doors and doorways and manual gates intended for user passage shall comply with 404.2.
 That means that if a door is located in a shallow closet, for example, that door is not technically intended for a person to pass through and therefore it does not have to comply


Why do we need so much room in front of the door?
The amount of maneuvering clearances at the door depends on the approach to the door.  Section 404 shows you the different ways that a person could approach the door and gives you guidance for the amount of clearance a person will need to reach for the door handle, open the door and go through.
The most well-known requirements are the forward approach pull and push.
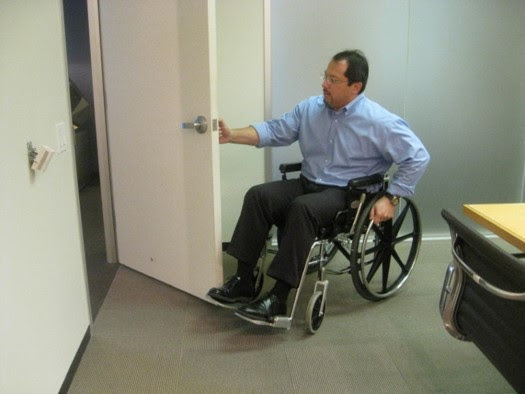
But why do we need so much room?  The rectangle shown in the figure provides the proper amount of space for a person with disabilities to reach the door handle, open the door and go through. Below are four images depicting the amount of space required for a forward approach pull side maneuvering of the door.
Interestingly enough, a door might be located in a thicker wall, or an object might be located on the same wall as the maneuvering clearance.  As long as the object is no more than 8” deep, or as long as the door is not located more than 8” from the face of the wall, it will be compliant for maneuvering for forward approach pull or push side.  Below are some examples:

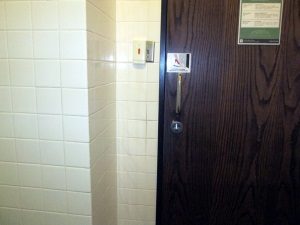
This door is located in a recess that is less than 8” deep. The 18” on the pull side maneuvering can include the wall that is in front of the door.

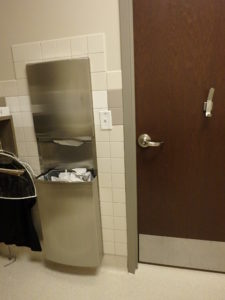
This door has a paper towel dispenser next to the 18” maneuvering clearance at the latch side of the door

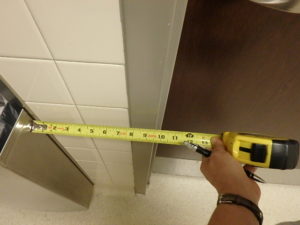
Since the paper towel dispenser is less than 8” deep, it can be part of the maneuvering clearance

But there are other ways one can approach the door, and the requirements for the amount of maneuvering clearance will change.  The table in section 404 shows the different approaches and the amount of space required for each.
The US Access Board created instructional videos to explain the standards. Here is the one about maneuvering clearances
Other types of doors
The requirements for doors also applies to toilet compartment doors. Except for the latch side approach which requires only 42″ of clearance, all other approaches will require the space per section 404
The requirements so far dealt with swinging doors and gates.  But besides the swing doors, there are also maneuvering requirements for sliding doors. These also require maneuvering and these are found in section 404.
this is a barn door that will require maneuvering clearance to open

Accessible operable parts and mechanisms

Tuesday, July 3rd, 2018
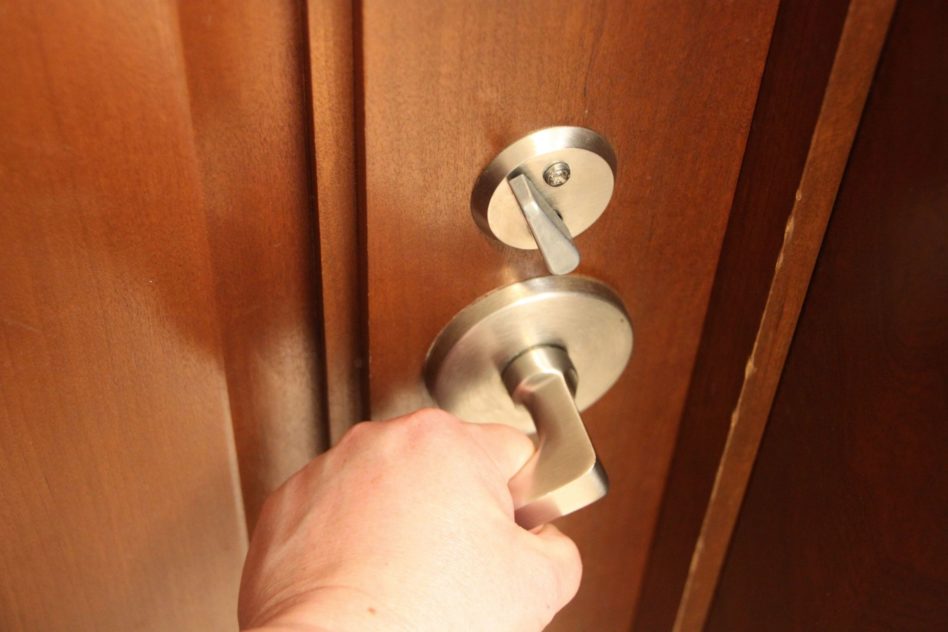
One of the guidelines that seem to be misunderstood is for operable parts.  This guideline requires that an accessible operable part have a mechanism that allows for operating or use without tight grasping or pinching, twisting of the wrist, with less than 5 lbs of force and to operate using only one hand.
ADA section 309.4 Operable parts shall be operable with one hand and shall not require tight grasping, pinching, or twisting of the wrist. The force required to activate operable parts shall be 5 pounds (22.2 N) maximum.
 
Why this is required?
There are persons that don’t have proper use of their hands.  People with rheumatoid arthritis for example, or cerebral palsy, have a hard time grasping elements.  Also, there are people, like amputees, or people that were born without hands or fingers that cannot operate elements which require tight pinching.  In addition, some people with disabilities or older people may not have the amount of strength required to operate an element or activate an operable part if the force required is more than 5 lbs.  Therefore, the ADA design guidelines provides rules to assist those people to navigate their environment in an equal manner.

Scoping:

Operable parts on accessible elements, accessible routes, and in accessible rooms
and spaces shall comply with with the standards.  There are some exceptions which explain that certain operable parts do not have to comply:
1. Operable parts that are intended for use only by service or maintenance personnel
2. Electrical or communication receptacles serving a dedicated use (like a refrigerator)
3. Where two or more outlets are provided in a kitchen above a length of counter top that is uninterrupted by a sink or appliance, one  outlet shall not be required to comply
4. Floor electrical receptacles
5. HVAC diffusers
6. Except for light switches, where redundant controls are provided for a single element, one control in each space  shall not be required to comply 
7. Cleats and other boat securement devices
8. Exercise machines and exercise equipment
9. Operable windows that are only operated by staff and not occupants
There is an advisory  that gives us more guidance and explanation;
205.1 General. Controls covered by 205.1 include, but are not limited to, light switches, circuit breakers, duplexes and other convenience receptacles, environmental and appliance controls, plumbing fixture controls, and security and intercom systems.
 
Section 309 
Operable parts have three requirements:
1) They must be within reach ranges as spelled out in the Section 308
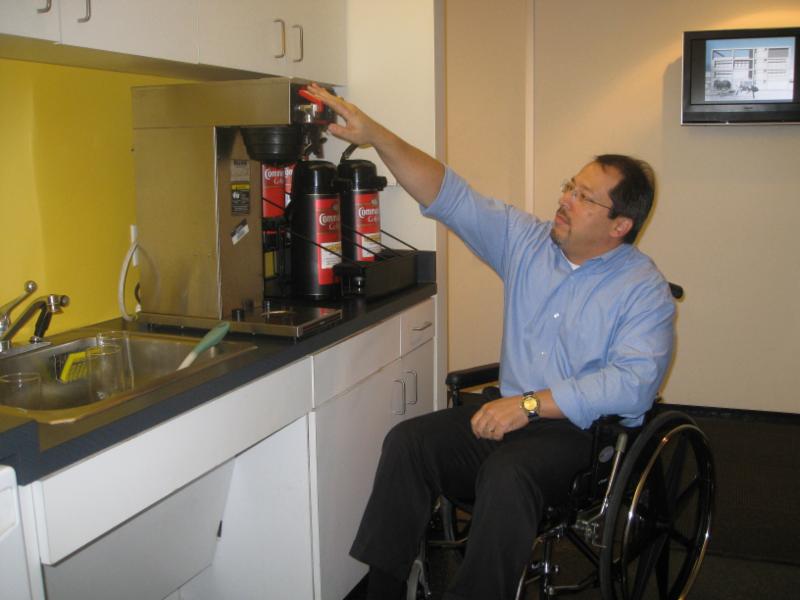
the operable part of the coffee maker must be no higher than 48″ a.f.f.
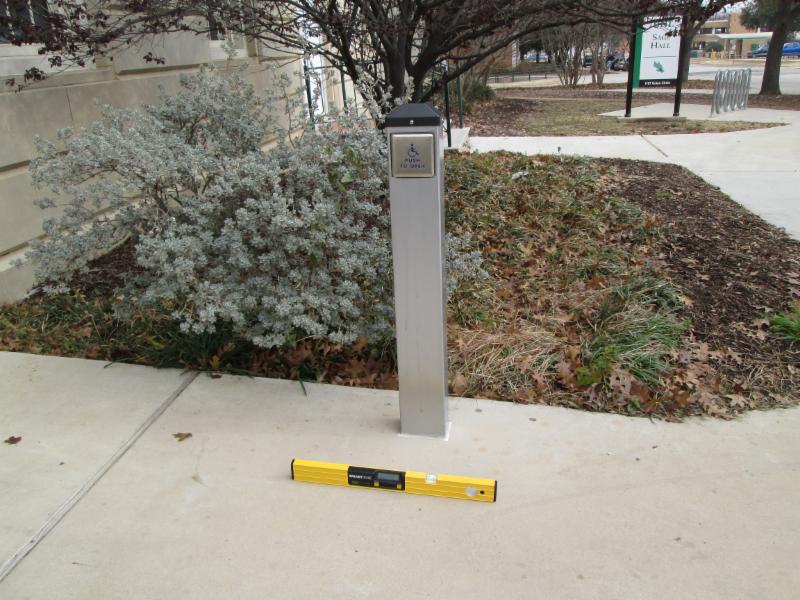
2) They must have a 30″x 48″ clear floor space to reach the operable part as specified on 305.  The clear floor space should have a slope no steeper than 1:48 (2%) in all directions.
the slope at the push button door opener was steeper
than 2%
3) and the operable part should be the type that will not require tight grasping and twisting of the wrist and no more than 5 lbs, like explained before.
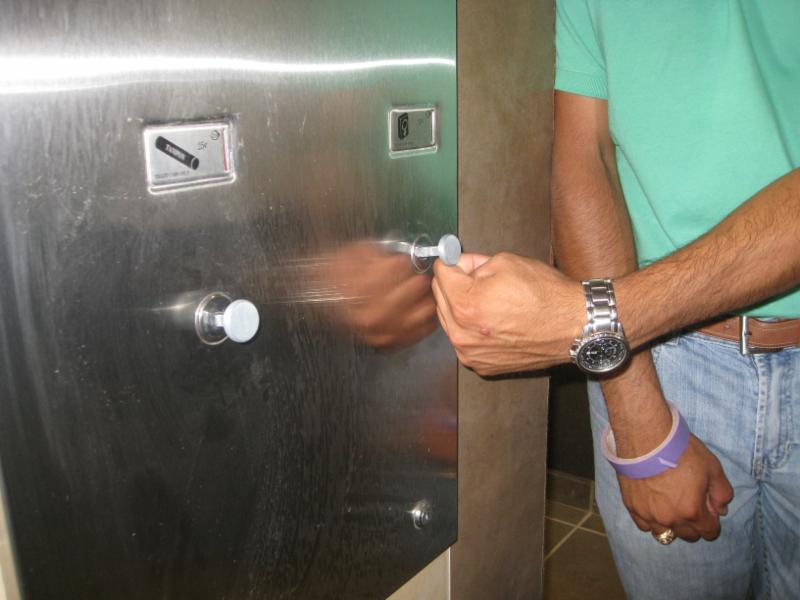
this feminine napkin dispenser operable part requires tight grasping and pulling to operate
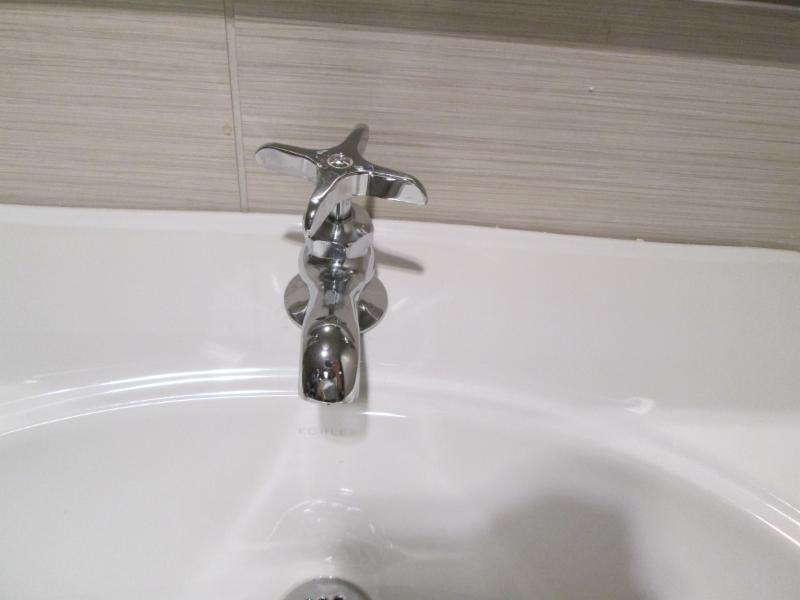
this faucet has an operable part that requires graping and twisting to activate
Below are some more examples.

Fire Extinguisher cabinet

I get this question a lot about fire extinguisher cabinets:
“Do we mount the cabinet so that the top of the fire extinguisher is between 15″-48″ a.f.f.?”
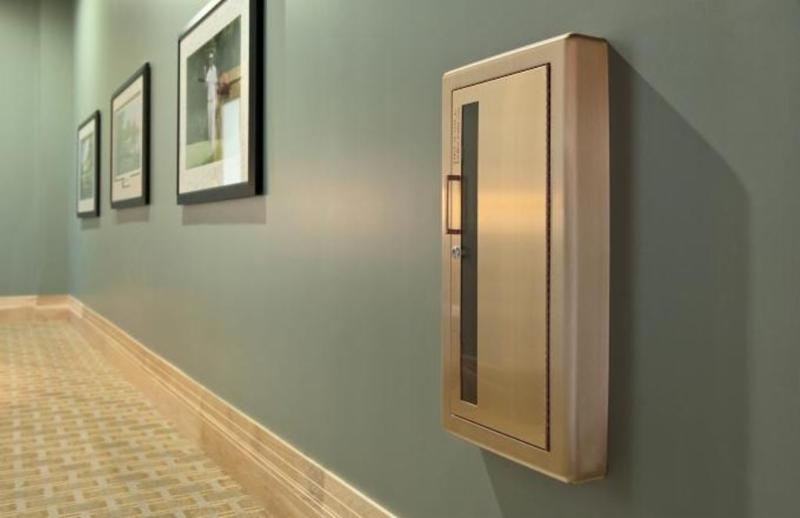
The answer is no.  The reach range is for “operable parts” of fixed elements.  So a fire extinguisher would not be the operable part, but the handle to open the cabinet would be.  So one should locate the fire extinguisher cabinet door handle between 15″-48″ a.f.f.
the operable part is the handle to open the cabinet door

Emergency Nurse calling

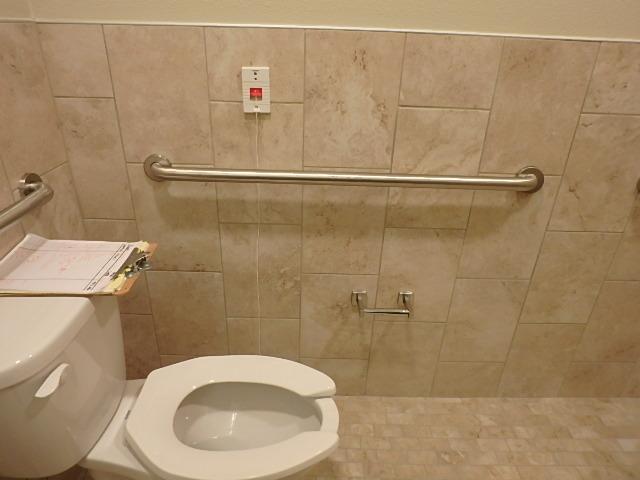
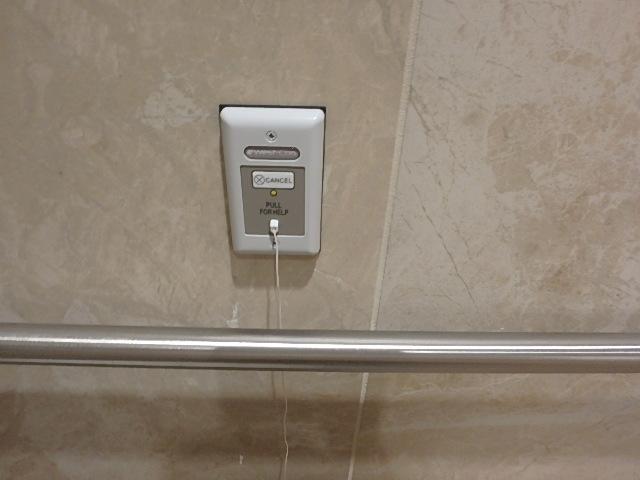
Another operating mechanism that is confusing is the emergency call button located in medical care facilities and long term care facilities. They are used when a patient or resident needs a nurse.  They are typically located next to the toilet and in the shower and they are required to have a string that reaches the floor.  The string is used if a patient or resident falls and they need to pull the string if they can’t get up.
this call button has a red lever that can be pushed down with a closed fist which has a compliant operable part
this call button also has a lever that can be pushed down with a closed fist which is a compliant operable part
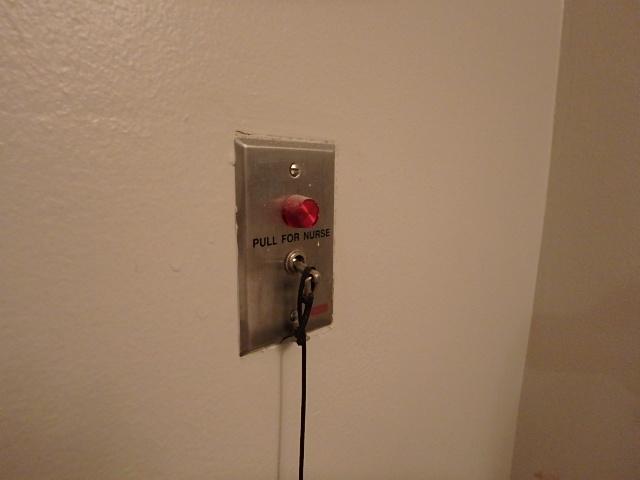
this call button is only able to be activated by grasping and pulling the string. This would not meet the requirements for accessible operable parts
In order for the call button to be compliant, it must not only have the string, but it should have a second way of calling the nurse which will not require tight grasping and pulling.

Adjustable mechanism at the hand held shower

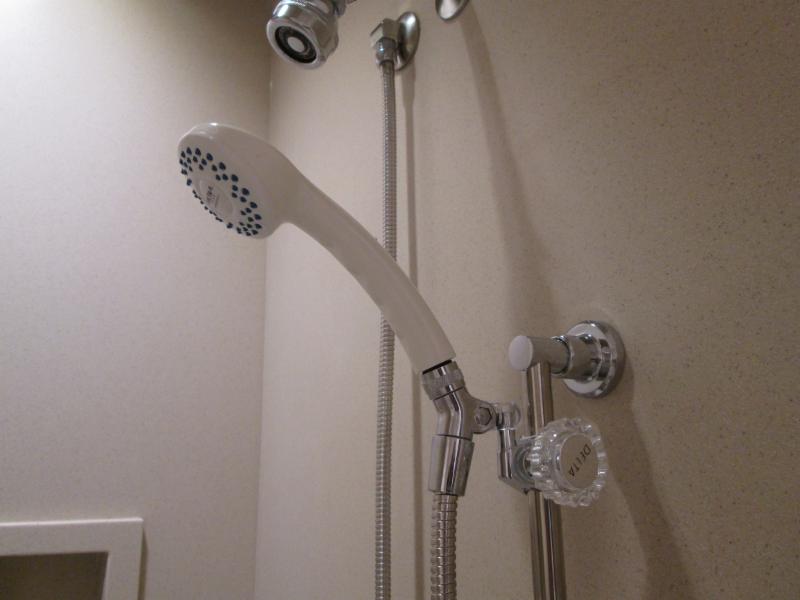
One of the operating mechanism that is forgotten is the one required to adjust a hand held shower unit.
the hand held unit height can be adjusted using the wheel next to the vertical bar.  The wheel requires tight grasping and twisting to
operate it and therefore not a compliant operating mechanism.
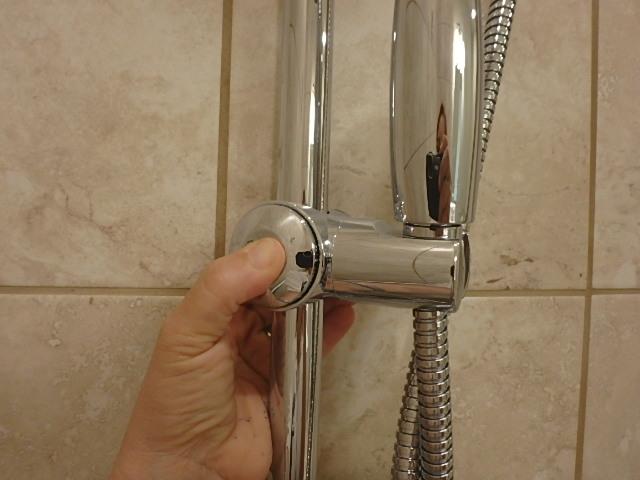
Once the height is adjusted, the mechanism to loosen or tighten the adjustable part is not always used again.  But the initial action to adjust must meet the requirements.  So the adjustable mechanism must also comply.
this mechanism does not require tight grasping to loosen or tighten
this adjustable mechanism requires pinching to loosen

Need Barrier Free CEUs?

We are giving classes in the following locations:
Metrocon18-Dallas Texas
 
Online courses:
Green CE On Demand webinar “How Accessible is Your work place?”
Green CE On Demand webinar “ADA and Residential Facilities”
or
If you want to learn more about these standards, be sure to check out my books:

Accessible Telephones and Emergency Calling Devices

Tuesday, April 3rd, 2018

Accessible Telephones

The 2010 ADA Standards for Accessible Design has a section 217 which tells us which telephones are required to comply with the standards.  The ones listed are coin-operated public pay telephones, coinless public pay telephones, public closed-circuit telephones, public courtesy phones, or other types of public telephones.
Most people assume the ones that are required to comply are “pay” telephones
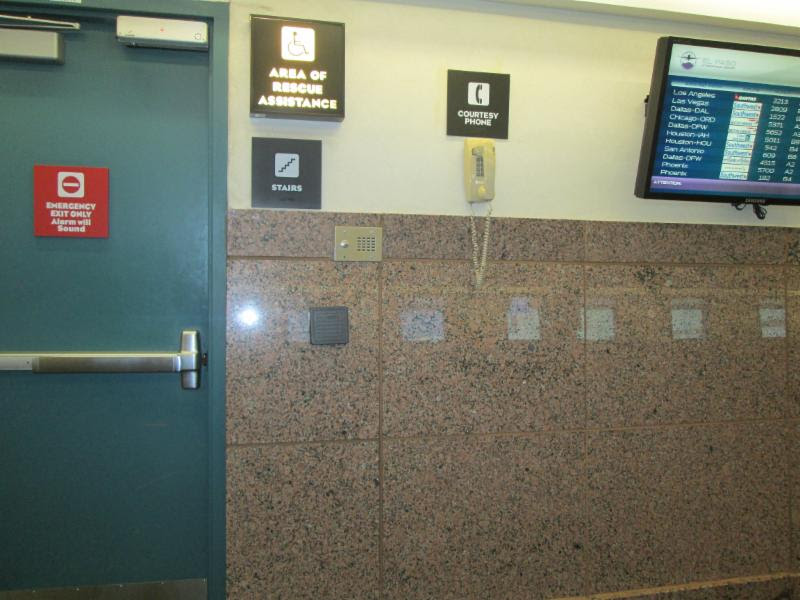
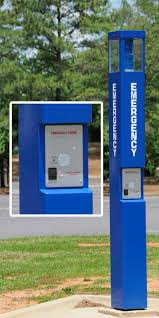
But there are many others that are required to comply that we don’t always think about.  As the list above explains, not just pay telephones, but also courtesy phones, and “other types”.  Other types will also include emergency calling devices.
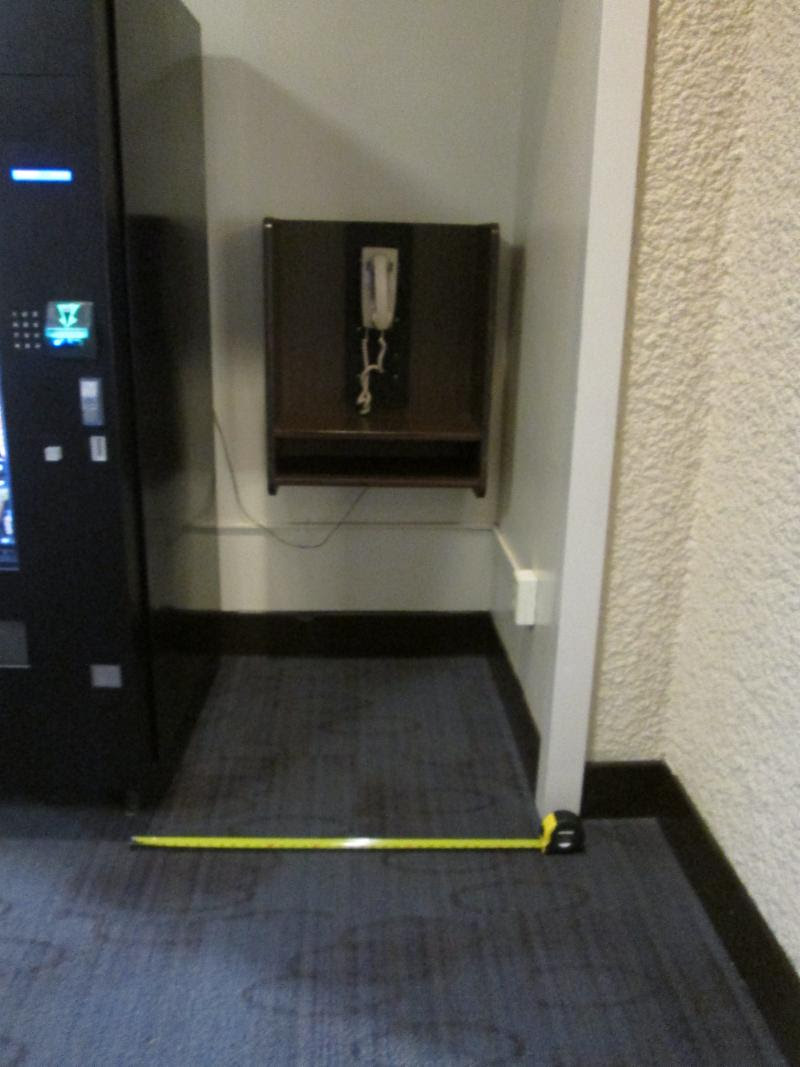
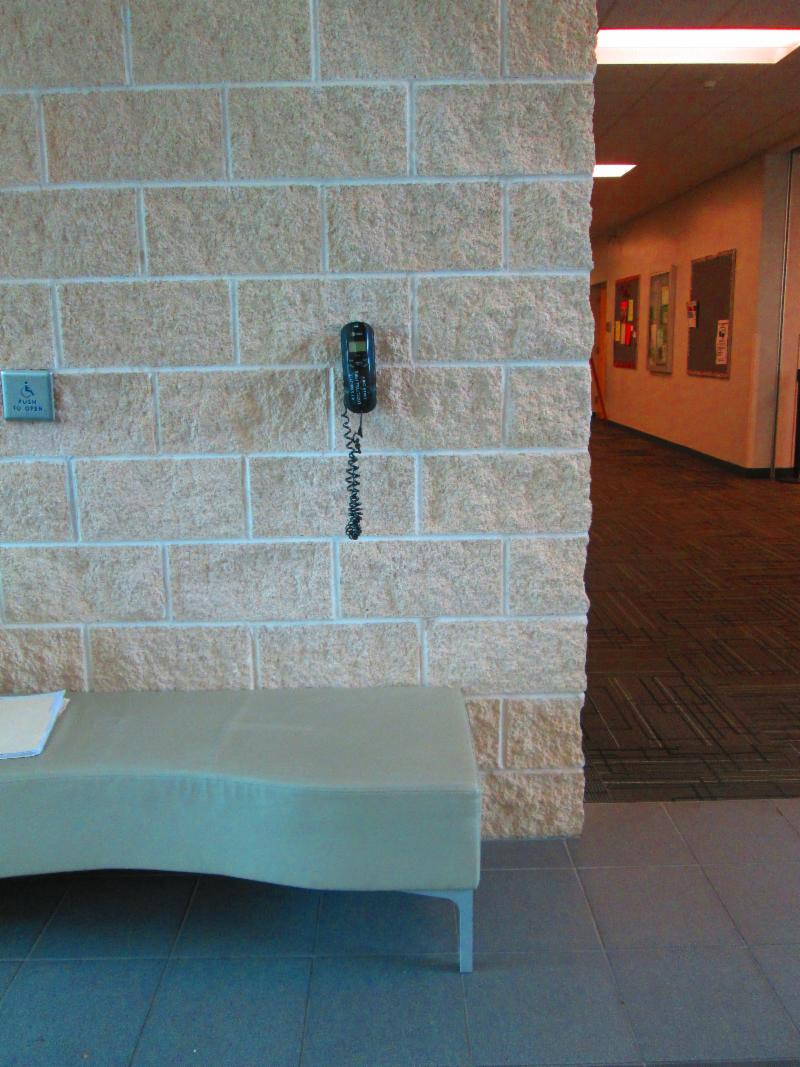
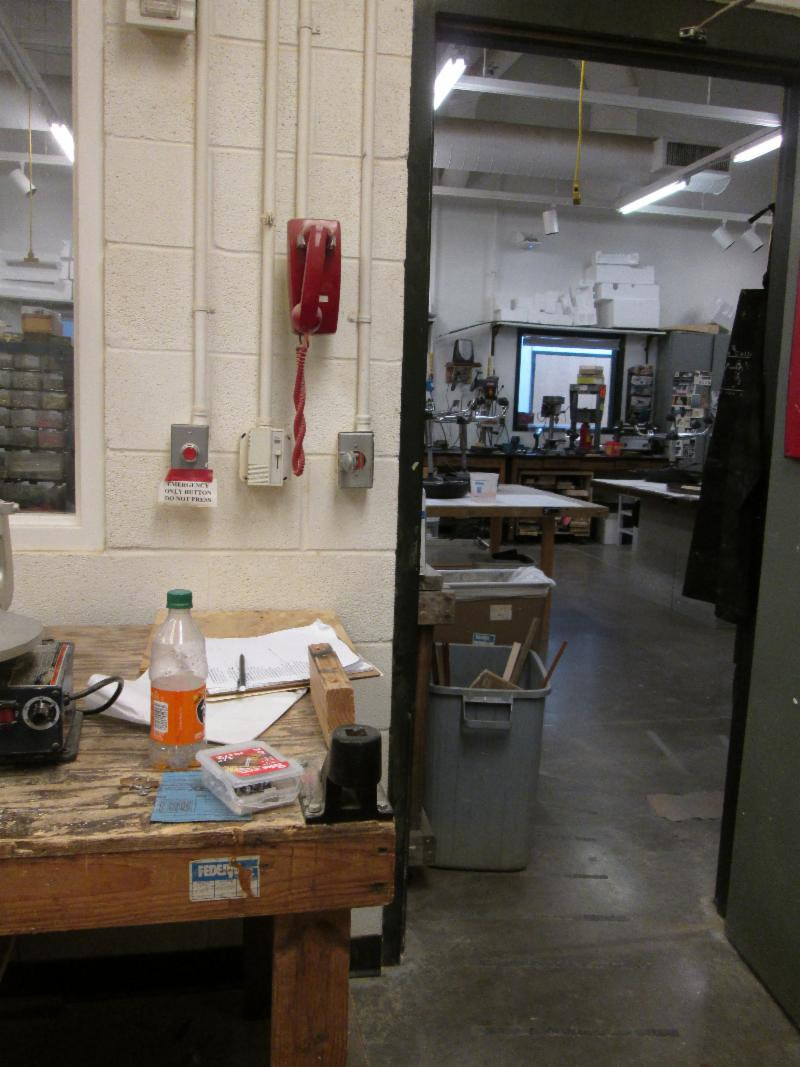
this is a courtesy phone that is required to be mounted within reach. This one is higher than 48″ a.f.f.
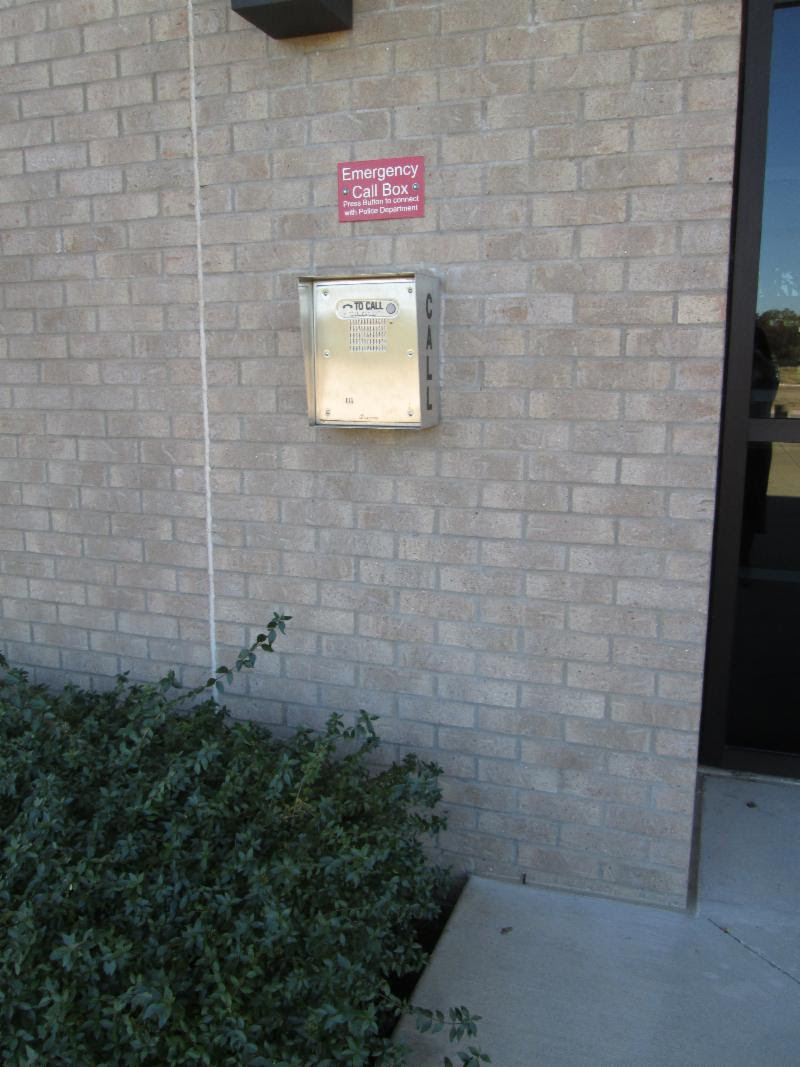
This is an emergency calling device that will require compliance

Requirements for Accessible Telephones

The ADA section 217 states that the telephones and calling devices that are required to comply should follow section 704
Section 704 tells us the following:
1) At least one of the telephones must be designed for the use by people who are in wheelchairs.
a) A 30″x48″ clear floor space must be provided.  The clear floor or ground space shall not be obstructed by bases, enclosures, or seats
the clear floor space to approach this phone is less than 36″ wide
There is a fixed seat in front of this telephone
The emergency phone was located over the landscaping next to the concrete pad. This is not considered having a “clear floor space”
This phone is located behind the planter. Even though the planter is not fixed, technically the phone does not have a clear floor space to approach it.
The phone is located behind a table
b) If the clear floor space is positioned for a parallel approach, it should be located as shown in the figure below
c) If the clear floor space is positioned for a forward approach, it should be located as shown in the figure below
c) Operable parts shall comply with 308 and  309. Telephones shall have push-button controls where such service is available.
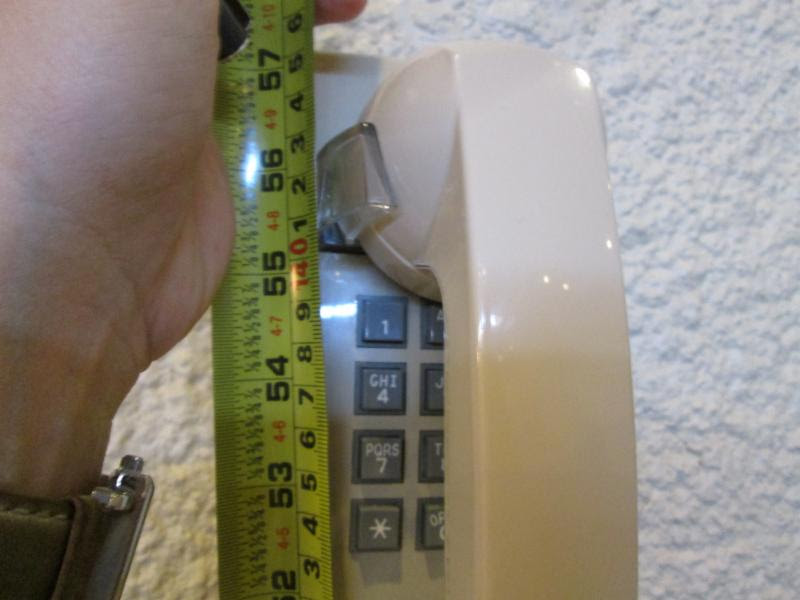
The operable part on this phone (the push buttons) were mounted higher than 48″ a.f.f.
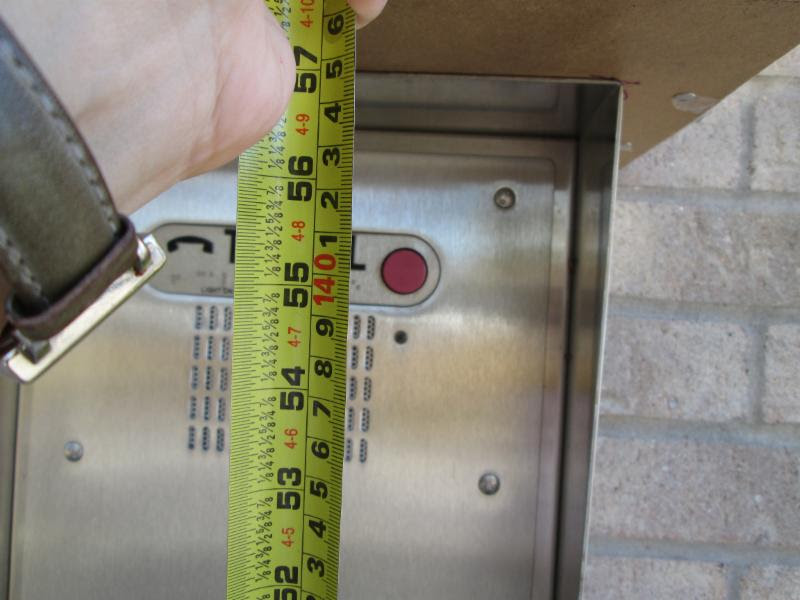
The button to call the police was mounted higher than 48″  a.f.f.


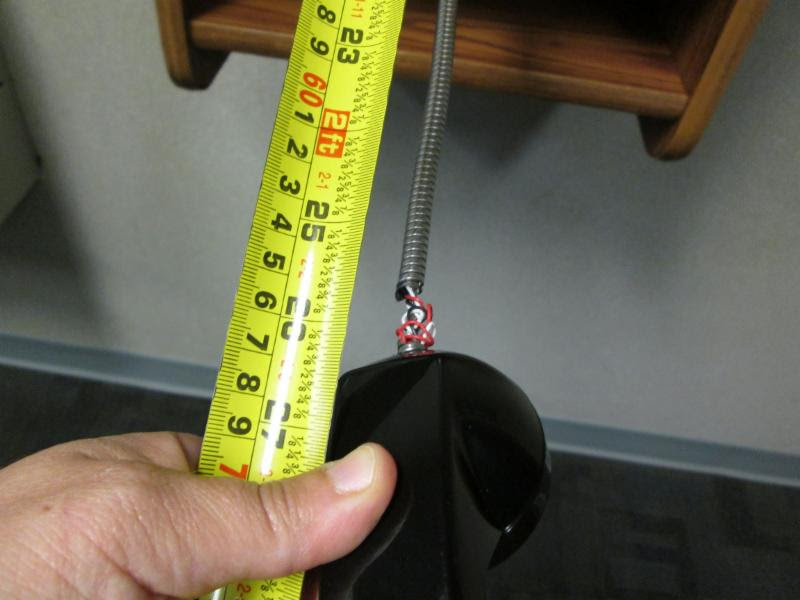
d) The cord from the telephone to the handset shall be 29 inches (735 mm) long minimum.
This phone had a cord that was 26″ long
2. The telephones should also be designed for the hearing impaired to have the ability to use it.  Some telephones are required to provide volume control and TTY (An abbreviation for teletypewriter)
a) All public telephones are required to have volume controls.  Volume controls shall be equipped with a receive volume control that provides a gain adjustable up to 20 dB minimum. For incremental volume control, provide at least one intermediate step of 12 dB of gain minimum. An automatic reset shall be provided.
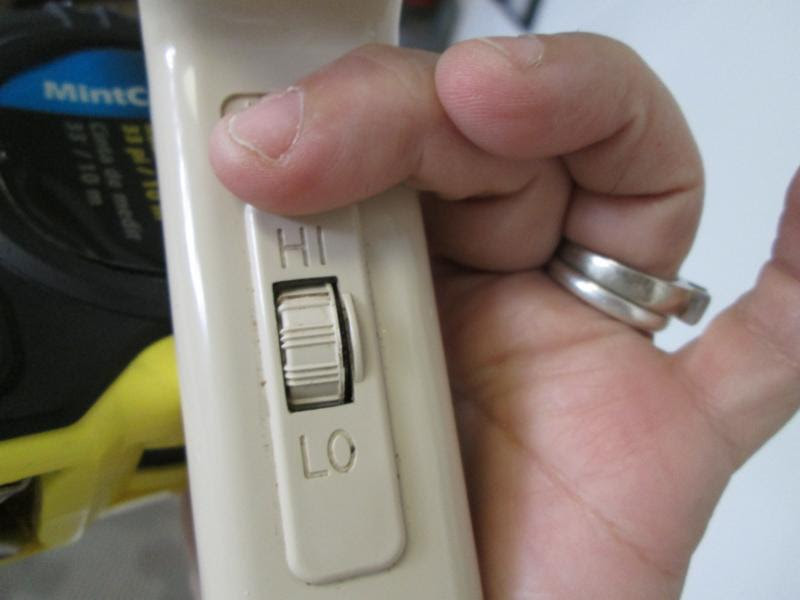
This phone had a volume control device built in on the handset


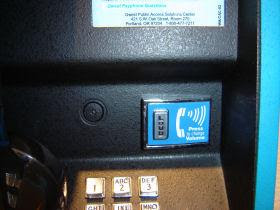
Most pay phones have volume controls on the cabinet
b) TTYs required at a public pay telephone and shall be permanently affixed within, or adjacent to, the telephone enclosure. Where an acoustic coupler is used, the telephone cord shall be sufficiently long to allow connection of the TTY and the telephone receiver.
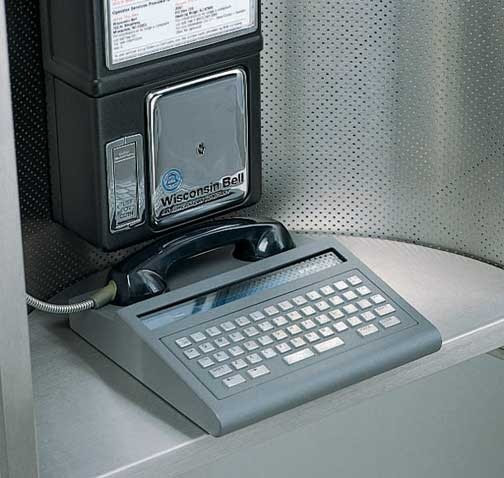
some TTY phones are placed on a shelf that is provided on the phone cabinet
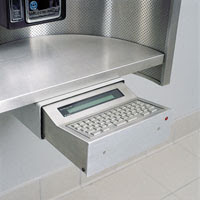
Sometimes the TTY is a permanent part of the cabinet

Emergency Calling Devices

Emergency calling devices are not specifically scoped in the 2010 ADA Standards.  Some have considered these emergency calling devices to be subject as a two-way communication element if they only allow communication between the called and one party. The standards only address two-way communication systems under 230 and 708 where admittance to a building or restricted space is dependent on the two-way communication system.  The closest similar device for these emergency calling devices is a “closed circuit telephone” per the definition section of the standards.
Closed circuit telephones must also comply with the requirements listed above and in section 704.  But volume control is not a common feature for these devices.  The use of the variance process in Texas is the only way you can achieve compliance.  In the ADA there is no variance process and therefore when providing devices that are not fully compliant, you can use “equivalent facilitiation” to achieve compliance and documenting this within the owner’s organization.

Summary

The telephones that are required to comply are not just the public pay phones that we are used to seeing in public buildings.  There are many more types of telephones that are provided in different facilities that require compliance.  Airports, Hotels, schools and other places of public accommodations will provide a “courtesy” or “emergency” phones and will also require compliance with the ADA Standards so that persons with different disabilities can also communicate.